An Adirondack chair — sometimes called a Muskoka chair here in Canada — can be anywhere from $20 to $400, depending on materials. You can get them in all colours and sizes. Some fade quickly, while others look great for years. There’s an overwhelming number of options.
While I really like the composite and plastic options that come in pretty colours and never need to be painted, it made more sense for us to build one ourselves.
We always love Ana White’s easy-to-follow woodworking plans, so I popped over to her site and grabbed the free plans for her classic 2x4 Adirondack chair. It even comes with plans for a matching footstool, but we skipped that for now.
Now, even though White lives in Alaska, many of her plans only call for “regular” wood in order to keep the projects affordable.
But this is Nova Scotia and our summers can be very rainy — not to mention the chair is likely going to sit outside year-round — so we wanted to use pricier pressure-treated lumber.

My handy husband went out to pick up the supplies and hit a bit of a snag right away. White’s plans called for four eight-foot 1x4 boards, but he couldn’t get pressure-treated 1x4s. He substituted pressure-treated 1x6s for the 1x4s, which meant he would need to adjust the final measurements slightly.
Once he was back in his Shed of Solitude, he quickly cut all his pieces and started assembling the chair according to White’s directions.
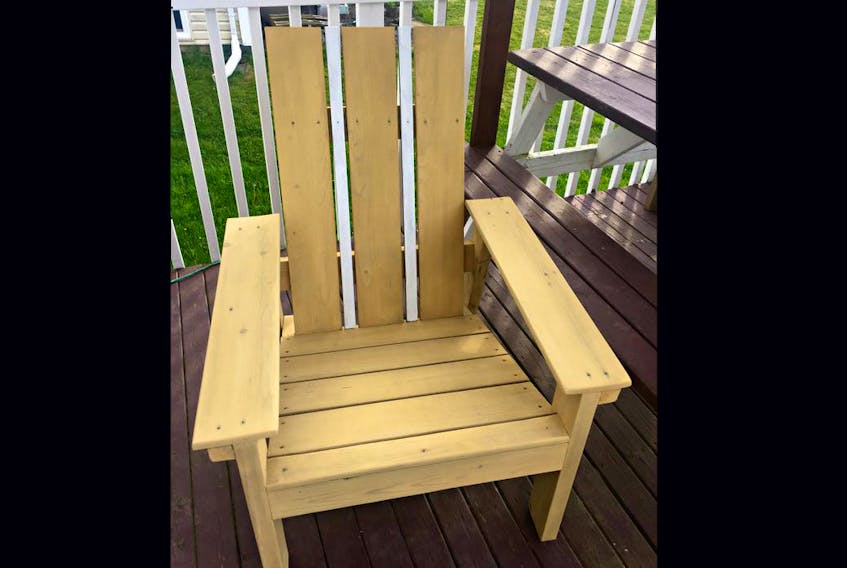
Choosing 1x6s over 1x4s meant he had to do a few modifications. It didn’t matter that the arms of the chair were wider — ah, more comfortable — and the seat worked out fine. But for the back of the chair, he couldn’t fit four 1x6s across and called me over to see what I thought he should do.
“I could trim all of them down, or I could just rip one into smaller strips and use one on either side of the centre board,” he suggested.
I picked the latter, since it was clearly going to be faster. Plus, I liked how the skinny strips ended up looking. I knew right away I would paint or stain them a different colour from the rest so they stood out even more.
When the chair was put together, we all took turns sitting it in. It was surprisingly comfortable, even without the seat rest. We all agreed we’d need to make a couple of more or else we’d all argue over this one.

During a thorough sanding to remove the pressure-treated green tint — and make the surfaces nice and smooth — I considered how I wanted to finish the chair. I was tempted to stain it, but decided it would be a good opportunity to use Miss Mustard Seed’s Milk Paint since it’s almost like a stain and best used on bare wood.
I picked a shade from my hoard (the classic Mustard Seed Yellow) and whisked the powdered paint with water in an old bowl I keep specifically for these jobs. As soon as I brushed on the first bit, I remembered how much I really do like milk paint. It soaks into the wood beautifully like a stain, but comes in brilliant opaque colours.
It’s neat, too, to see how milk paint changes depending on how much water you use. I started to run out toward the end, so I was stretching it out with water and getting thinner coverage — more like a soft yellow colour-wash on the wood. In the end, I scraped by with just enough.
For the two skinny boards running up the back of the chair, I went with classic white (Picket Fence by Fusion Mineral Paint) since they looked kind of like racing stripes. It poured rain the next morning, before I could seal or top-coat it, so I suppose we’ll see how each type of paint holds up to the elements. It’ll be an interesting challenge to see which one wins.
Since we plan to build at least one more of these chairs, I’ll paint it with a different colour of milk paint — the kids have requested blue, so I think I’ll buy some French Enamel — and repeat the white stripes on the skinny boards. Then the chairs will coordinate without needing to be exactly the same colour.
Now, if it ever stops raining, I’ll give this chair a proper test by sitting in it to read a book in the sunshine.
MORE OF MY HANDMADE HOME: